Sunday, April 29, 2012

Reusable Usables!


The one thing about having the reputation for "being crafty" your friends are constantly looking out for you.

"Hey Bets wanna take a road trip I found a store you will LOVE!" This was the message my friend Amy texted me a couple of weeks ago. She was driving to meet her kids and had some spare time to wander around and found a store that was a bit different.

Reusable Usables

When you walk into the store you immediately notice there is something different. Gone are the typical rows of brand new crafting supplies, instead you are met with supplies, leftovers and other treasures that might otherwise be tossed aside. The goal of this store is to "Engage a mind and save a landfill."


 Shelves are filled with not only industry leftovers of paper, binders, clips and desk supplies, but remnants from upholstery/decorating stores and even others cast off crafting supplies.  There was no ending to the variety and types of supplies and treasures you could find! I managed to pick up, some wooden doll heads, several needles for my sewing machine, a few beads, and even an entire book of silk fabric swatches! For good measure I tossed in some 15" chipboard circles to give to my girls' violin teacher (she uses them to help kids with their foot position.)


All supplies are purchased by the pound and you purchase a pound pass to use at the store. A 10 pound pass was reasonable for $10 and any leftover is kept on account to use at a future date. Their inventory is constantly changing so there may never be the same items twice, meaning if you see it there pick it up when you can!

The walls were adorned with jewelry, and artwork by local artists. Many of the pieces created were made using supplies from around the store others were not only hanging to inspire but many were for sale as well. The store likes featuring artists that use scraps, recycled, and repurposed materials.


Seeing all these supplies not to mention the artwork on display instantly put me in the mood to craft. If I would have had more time I could have. The store also features a craft room with not only space, but supplies to use as well. You can pay for what they call a "Drop in Art" or even sign up for the many classes the store offers.

 I left Reusable Usables with my mind awhirl of ideas and a desire to go back next chance I have. I just need to convince my pal Amy to let me ride along on the next trip to Iowa!


Saturday, April 28, 2012

Faithfully Yours

Several years ago I met my good friend Dawn over at Faithfully Yours. After chatting awhile we found out that we had so much in common, 4 kids, we homeschooled, we paper-crafted, and we shared our faith. It was the beginning of a beautiful friendship that has really blessed and enriched my life. Dawn asked me to write for this weeks ezine. The topic "having faith,"

Why don't you go check it out

Faithfully Yours Ezine

Monday, April 23, 2012

Shadow Box Canvas

While I have never considered myself an artist, I do consider myself a crafter. I reserve the title of "artist" for those whose pieces I think belong in a gallery or hanging in the art institute. The interest in "mixed media art" has me fascinated. I love the painting and different textures and little accents and touches. It boggles my mind at how they can take so many different mediums and turn out a piece that looks so "put together."

Last  summer the Craft and Hobby Association's trade show had a focus on "Mixed Media Art." It made sense being that so many crafters have their hands messy with more than one art form. This being the case many of the vendors at the show, demonstrated how their products could be used in mixed media. I sampled and dabbled and tried them all. I had so much fun playing that I finally decided to jump in and try something new.

The phrase "pieces of my heart" kept drifting through my mind.  I envisioned hands tenderly holding cherished pieces of my heart. I know that I can't draw to save my life so I wanted my piece to revolve around a photo. I didn't want to just stick the photo to the canvas so I had the idea to shadow box the photo within the canvas.

Since a blank white canvas can be intimidating I started with a messy base coat of a creamy metallic colored acrylic paint, I then topped it with some music I photo copied and then distressed and tore up. I used Mod Podge to not only adhere down but to give the background a bit of a glossy texture. When it dried, I used my USX as a stencil to add a window in the canvas. Instead of using the USX blade with the template I used my Fiskars retractable fingertip craft knife to cut out the window. I then added a double mat frame using the same template I made the window out of to give me an exact fit. I used a transparency as my window glass to seal in the photo.


For the heart I wanted a kind of free form heart that somehow fit together, yet didn't but still made up the heart. Painted puzzle pieces fit the bill perfectly. For a caption I played around with different fonts of chipboard letters, edging some in gold and glittering others. To finish it off I added a touch of coordinating ribbon just cause I thought it needed a bit of movement along the side.


While I'm not sure the finished piece could "technically" be considered "mixed media art" based on today's standards. I was really pleased with my finished piece. It was fun to figure out how everything would fit together and dig through not only my paints, but my inks, metallic rub-ons, and papers, and even tossed in some photography as well.


Supplies used: 11 x 17 canvas, black art board, sheet music, chipboard-My Minds Eye, Rusty Pickle, Lil' Davis, photograph, old puzzle, paint-Plaid folk art various colors, Krylon Glitter Blast (starry night), Ink-Color Box Q Stack(chocolate and blueberries), Ranger Distressed Ink (vintage photo, tea stain), Metallic Rubons-Craft T (Set #2), ribbon-Stampin' Up!, Crafts Etc.,  Fiskars USX Template (Rectangle), Fiskars Retractable Craft Knife,  Mod Podge, Xyron 900, Glue Gun, Glue Dots, Staples.

The perfect gift


Growing up was an adventure. Mom was a single parent raising two daughters on a modest income so we learned to not just improvise but create what we didn't have. Being a school teacher, mom made sure we were never short of crayons, and paper and pens. Having the initial desire to go into commercial art we were never short of art and craft supplies as well. 

My sister and I were constantly "making things." Doll houses out of boxes, paintings, finger weaving, I even recreated "Charlotte's Web" in my bedroom-granted it was connected to the dresser, and the bedpost, and the table, and the desk. My goal was to be able to crawl across it to get to things in my room. (It didn't work.) Mom helped us with school projects and making costumes and doll clothes. 

Mom also filled the house with music. Having played the viola through college, mom loved classical music and wanting to rekindle that flame took the instrument up again when I was young.  For my sister and I this led to music lessons of our own. Piano, flute, and bells for me. Oboe, Bassoon, and Cello for my sister, plus both of us were in choir and enjoyed singing. 

Our faith was also a big part of our lives. Mom was active in our church serving as Sunday School director, a member of the alter guild and vestry. Because of mom's involvement, my sister and I were acolytes, worked in the nursery. I even led the Jr. High youth group when I was older. But my mom's faith was more than just being active in church. My mom believed that what she did with her talent was a gift back to the Lord. She one time shared with me that even her music was her prayer.

So much of whom I am is because of my mom naturally the news we received in November was earth shattering; the cancer had returned, in her spine. They gave her 4-6 months without treatment 6-8 with.  I walked around in a daze, I think we all did, just letting the news sink in. I know none of us are guaranteed our tomorrows but to be told someone you love is even closer to death is devastating. 

After I came to terms with that news, another realization hit me…this might be mom's last Christmas with us! What do you get a person that means the world to you when this might be the last present you ever give them?!?

So I started really thinking about who my mom is, what she has taught me, and what she means to me. I knew I had to make her something (she loves handmade gifts) I also knew I wanted it to revolve around her music and maybe her faith as well. 

I rejected one idea after another and then I found "IT" not just any it, but the most gorgeous violin paper. I was at a craft warehouse sale and found two sheets of Autumn Leaves paper from 2000. (11 year old paper in the paper world is probably itself considered vintage.) 
I knew this was to be the foundation of my mom's Christmas present. Looking around the sale I found some 12" x 12" tiles and I knew a decorative tile was in the making.


I wanted the emphasis to be on the violin and the quote I chose so I kept decorations down to a minimum; antiquing the edges of the paper with ink then adding a touch of gold here and there. Using Mod Podge I adhered the paper to the tile and then added the quote I cut out with my die cutting machine. Another layer of Mod Podge to seal everything in finished off the piece. 
To display the tile I found a gold book easel that coordinated with the gold accenting the violin. I loved the way it turned out. The project itself was simple to do but the results were very elegant. The end result was a gift for my mom that was totally "ME." Something handmade from the heart (which she loves) and something that celebrates not only her music but her faith.

Needless to say she loved her gift. She even cleared off a spot on the piano to display it. It has even become the focal point when she teaches viola. While trying to get her students to add more emotion to their music she says, "read that," (pointing to the tile,) "now pray with your music."  So the decorative tile I created for her even helps her to pass on her musical legacy as well.


Supplies used: Supplies used: 12 x 12 tile, Patterned paper Autumn Leaves, Ink, Ranger-Vintage Photo, Stampabilities-Gold, Cricut Cartridges- Jubilee, Plantain Schoolbook, Lyrical Letters, Base Camp, and Alphalicious. Mod Podge

Sunday, April 22, 2012

Earth Day!

Happy Earth Day!

In the spirit of Earth Day I decided to try and "recycle" our old paper into new. Having experimented before with handmade paper, I wanted to try something a bit different. I wanted my paper to be shaped, yes I know that I could just make the paper and then cut it out, but I wanted it to be a bit thicker and have more definition along the edges than a typical die cut, not to mention texture. So I decided to try and make a paper mold and deckle using my Fiskars  USX Shape Templates.

Supplies needed:
Old paper-anything without a glossy coat works, copy paper, newspaper, paper towel etc.  Traditional card stock works as well but I found the heavier paper needed to soak in water for awhile before the blending in step 2.

Screen- if you have an old screen you can cut that up or pick up some inexpensive household screen at the hardware store

Blender
Bowl
Water
Towels
Binder Clips
USX template of choice (I used woodland tree, and cupcake)
cookie sheet

Optional: rolling pin

Step 1: Tear your paper up into 1 inch squares, place into a bowl with enough water to cover the paper allow to soak.


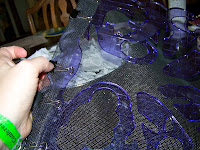
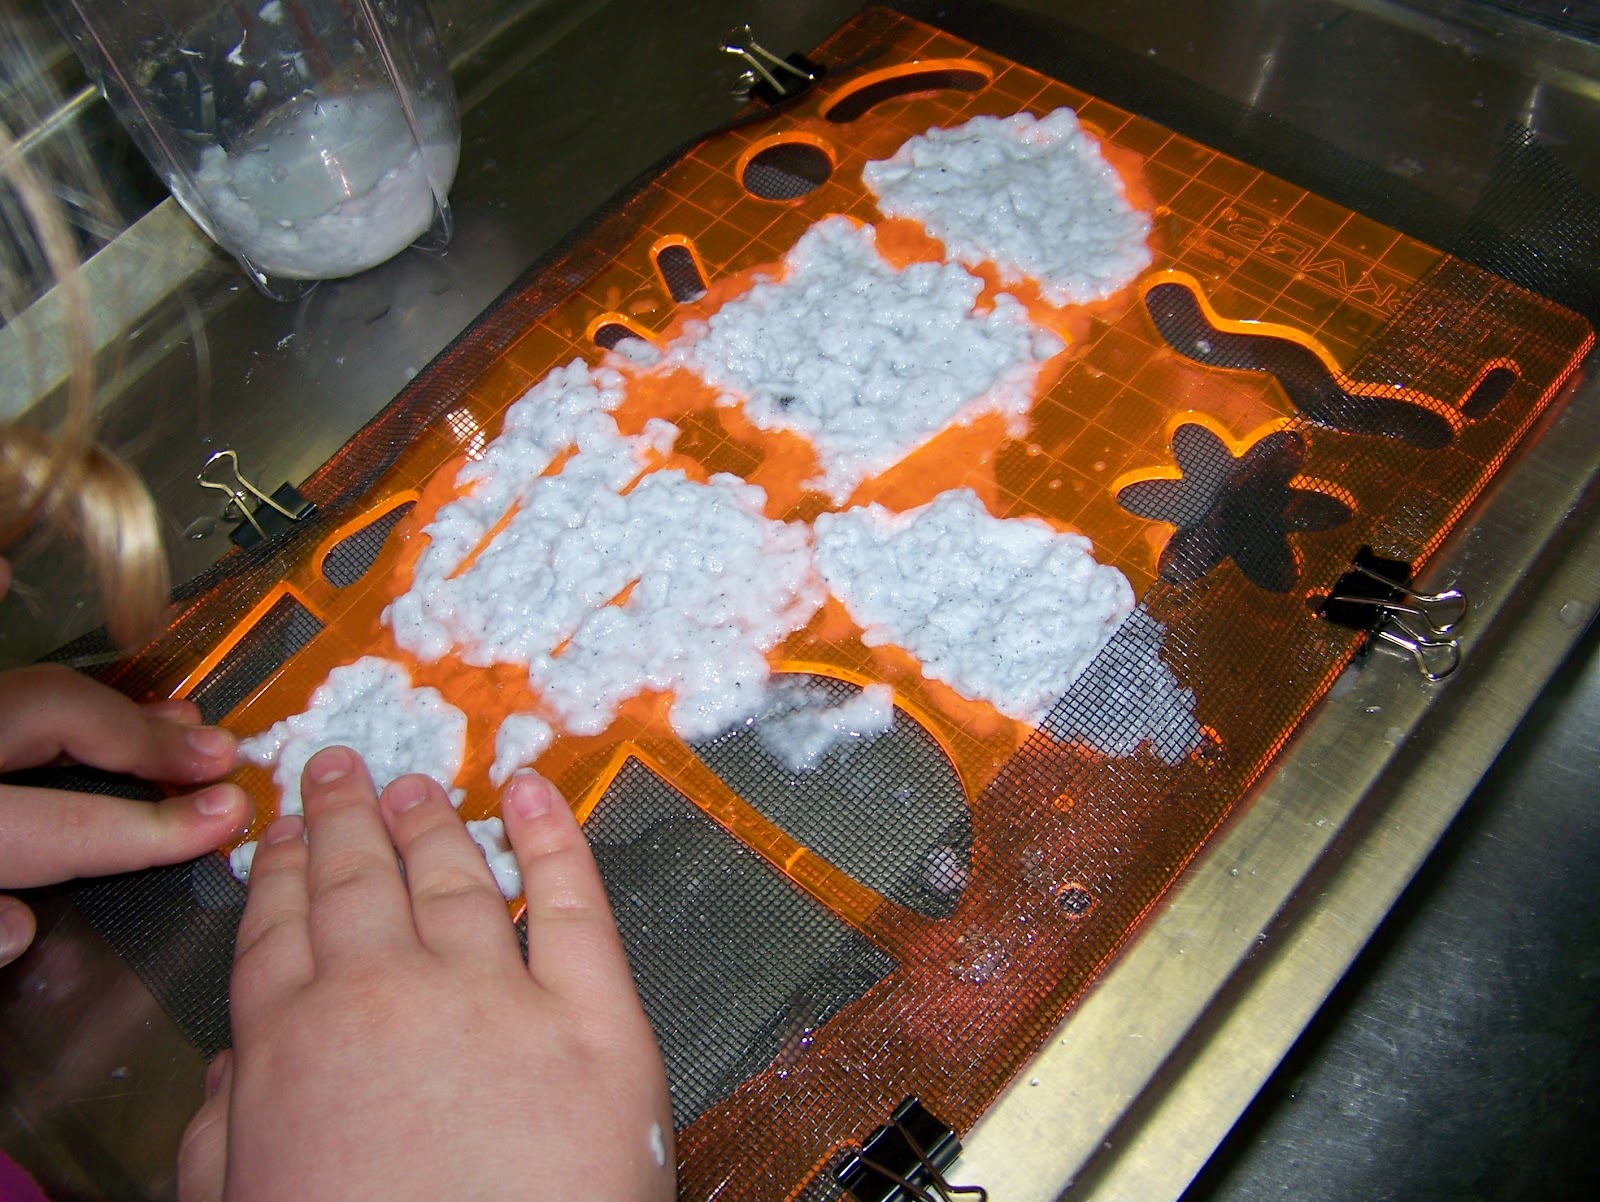
Step 2: In the meantime create your mold and deckle. Your mold is the screen that what you paper will be created on. The deckle is the edge that will shape the paper in this instance you are going to use your USX template. Take the screen and attach it firmly to the template using the binder clips. Pull tightly as you don't want there to be space between the screen and the template. I found there is an edge to the templates and therefore you will have less seepage if you flip your template upside down. This will help prevent some of the seepage that naturally occurs.


Step 3: Using your blender, add a couple of handfuls of the wet paper and then enough water to blend easily. This will be kind of trial and error depending on how heavy your paper is. The thicker the paper the more water you will use. BUT the more water you use the longer it will take your paper to dry. To start try about 4 cups of paper scraps to 2 cups of water. Blend until the paper pulp starts to look like wet cotton.


Step 4: Fold up a towel and line your cookie sheet with it. Place your USX mold and deckle on top of the towels. Using your hands fill the shape with the paper pulp packing it in. Make sure you not only fill the corners but that you get an even layer of pulp. If some spots are too thin it will cause your paper to either loose shape or tear easily.


Step 5: Once you have a nice thick layer of pulp, start working the water out of the paper. To start you can use your hands, as it gets drier you can even place an additional towel on top and use a rolling pin to work out water. Change the towels as necessary.


Step 6: Allow to dry. Depending on the thickness of the paper, moisture in the pulp and air this can take anywhere from several hours to a day or longer. If you wish to speed up the process and don't mind your shape a bit "flatter" you can carefully un-mold your paper and use an iron on it. Be careful to press firmly down without shifting. Like any paper it tears easily when wet.

Step 7: Remove your paper mold. You may notice some rougher edges if pulp seeped under the edges, this is easily removed with scissors or a bit of sand paper depending on the thickness of your paper.

The finished paper has the feel and weight of an egg carton.Your shapes can vary in thickness anywhere from a heavy textured paper to almost a paper clay texture that is the thickness of chipboard depending on how thick you applied the paper pulp.

The paper you have created is fun to ink as the texture of the paper pulp provides an interesting texture.


As of this writing my tree was STILL drying, but my squirrel was dry as was the acorn so I decided to create this card:


"Nuts About You"
Supplies used: Fiskars USX template-Woodland Tree, Cardstock-Bazzill, Patterned Cardstock-Fancy Pants-Childlike, Ink-ColorBox Q stack( Chocolate and Blueberries), Fiskars LED Rotary Trimmer with straight and deckle blades, gemstone, Metallic Rub-on-Craft T (Set #2), Stamp Font- Embellish It (Basic Type,) glue dots, glue glider perma tac.

Thursday, April 12, 2012

Birthday Pie!

Around here the birthday boy (or girl) gets to pick the kind of cake they want for his or her special day. For my husband it has always been PIE!
Normally it's not just ONE type it's two! This year's selection was his favorite, apple pie. I couldn't just leave it plain I had to spruce it up a wee bit, with some fancy knife work. Apparently I've become quite a legend at his work, rumor has it he snaps photos of his birthday treats and then "shows off" at work.

Happy Birthday Honey! Enjoy your pie!

Saturday, April 7, 2012

Easter Jelly Beans


Easter is a time to CELEBRATE the resurrection of Jesus! This year with my children at church, I have tried to help them create reminders about the true meaning of Easter. While the eggs and candy are fun, Jesus is the real reason we celebrate! Yet who can avoid all the candy of the holiday? The result is telling the Easter story using the colors of jelly beans.


There are several version of the "Jelly Bean Prayer" floating around out there but our kids have learned the colors of the wordless book and I wanted the jelly beans in our lesson to match closer to that. The result is the poem "Easter Jelly Beans"


Easter Jelly Beans

Orange is for the sun He made,

to give us light and heat.

Green is for the grass He made,

soft beneath our feet.

Black is for the wrong we've done,

filling our hearts with sin.

Red is for His precious blood,

that cleanses us within.

Purple is for the time of sorrow,

He suffered for me and you.

White is for a precious life,

By His grace has been made new

Yellow tells of heaven,

and streets paved with gold.

Pink reminds us of the promise,

of the greatest story ever told.

This little bag of jelly beans,

is not just an Easter treat.

It is a picture of a promise,

of Jesus' work complete!


The kids enjoyed learning about the real meaning of Easter (while getting to much on a few jelly beans) We also wanted to share what we learned with friends and the members of our congregation. So the kids packed individual bags of jelly beans for all the members of the congregation, (tip; Brachs' jelly beans have all of the above colors) we then stapled a copy of our poem. The result was a fun (and tasty way) to share about Jesus this Easter.


Have a very blessed Easter!


Friday, April 6, 2012

The blooming cross!

Being the daughter of the one in charge sometimes has it's advantages. One being you get to make all the fun projects twice! Our Easter dish gardens were no exception! My daughter was excited to be able to give her duplicate garden to her grandma!


Imagine her surprise though when the grass in the dish garden wasn't the only thing growing! To make the crosses I cut down branches from a shrub in our yard. Most of the branches were dead and those that were not had all buds removed and then were cut down to 3 and 4 inch lengths. We tied these together then with hemp twine.

When mom had my daughter trim back the grass yesterday they were both in for a surprise. The center cross (the one representing where Jesus died,) made of twigs that had their buds removed and then cut into 3 or 4 in lengths and tied together with twine and stuck in a pot of dirt was GROWING!


 They both were so excited to see the growth against all odds! Even more amazing to me, when mom saw it she felt such a sense of peace! She's been dealing with a lot lately and she felt like Jesus' cross growing was a sign to her that everything was going to be ok!

I hope this Easter season finds you in a place of peace as well. Let the blooming cross be an example that you too can grow, you can even bloom, in the midst of circumstances where you shouldn't be able too. There can be life after death with the power of the cross!


Wednesday, April 4, 2012

Easter Fun!

So what do you get when you mix 16 kids with mud and rocks and sticks?? Well an adorable Easter craft that is a good reminder of the meaning of Easter.

The idea came from a post I saw on facebook. The original was shared as a friend of a friend so I really have no idea where is originated from. It was to make an Easter dish garden.

Supplies are simple. A large dish (we used a saucer from a flower pot), rocks, 2-3 inch flower pot, a large stone, potting soil and grass seed. We made sure to use a good quality potting soil (like miracle grow) and a shade loving grass seed to avoid the whole "lots of sun light" issues some might have with a house plant. For the crosses you will need a few straight twigs, some hemp twine and garden shears.

Start with a layer of smaller stones in the bottom of the dish-this helps with drainage. Then to 1/2 half of the dish add larger stones and the small flower pot on it's side.


Wet down your potting soil till you have the consistency of well MUD. Even though the soil is messier this way it makes it easier to shape. Bury the flower pot in a mound of soil making sure to leave the side open. Put a good layer of grass seed on top of your mound of dirt. Then add your crosses.

To make the crosses, we cut down branches from my yard and then trimmed to side and bound them with hemp twine.


 Put your dish garden in a sunny window and use a spray bottle to water daily. Even after it starts grown continue spritzing. Trim the grass down as it gets to tall.


As you can see it's growing quite well we need to already trim it up cause you can't see the crosses. Simple project and great living reminder of Easter, plus it will make a great centerpiece for our Easter dinner table as well!  Happy Easter!

Sunday, April 1, 2012

Winner!

Thanks for the comments on my knitting. I'm just about done. Just in time for the weather to warm up!

The winner of the Kitting book is:


 Ladydoc said...

Love to knit and that looks like a fun book!
March 23, 2012 10:58 PM
 Delete


Ladydoc email me with your address and I'll get your book out to you! Thanks for being a reader!