Showing posts with label cards. Show all posts

Monday, September 12, 2022

Blog Hop-with Gina K Designs "Flutter By" Shrink Art Earrings

Welcome Designer Crafts Connection Blog Hoppers! 

My mom loved daisies and butterflies, especially Monarch butterflies. So whenever I see a Monarch butterfly I think of her. Imagine my surprise when I was sent the Gina K Designs "Never Lose Hope" Mini Acrylic Stamp Set to create with for the Designer Crafts Connection Blog Hop! It seemed like it was meant to be. 


"Flutter by"-Shrink Art Earrings

Supplies- "Never Lose Hope" Mini Acrylic Stamp Set-Gina K Designs, Grafix Shrink Film, Permanent Markers, white gel pen, Staz-On ink pad-Black,  acrylic stamp block,  2-3" long pieces of chain, jump rings (3mm,6mm), fishhook earring pieces, small glass beads, headpins, round nose and needle hose pliers, wire cutters, oven, parchment paper, scissors, hole punch, cookie sheet. 


Using the Staz-on ink and an acrylic stamp block,  stamp your butterfly image onto the shrink film and allow to dry. When dry, color in image using the permanent markers. I like starting with the darker colors and blending with the lighter ones. Accent with the white gel pen. Allow to completely dry before cutting out.  Please note your colors will shrink "more intense" 


Preheat your oven to 300 degrees F. Cut your designs out of the shrink film. I like to use larger scissors to cut out the basic shape and then use detail scissors to get the tiny parts. Using the hold punch, punch holes in the corner of the images.

 Line your cookie sheet with parchment paper. Lay out your shrink art stamped images.  If you are concerned with your images not shrinking "flat" then cover them with another piece of parchment paper. Place in oven for 2-3 minutes to allow images to fully shrink.  They will be about 20% of the original size when finished. Allow to cool before handling. 


To create your earrings. Thread your beads onto your headpins. Using the round nose pliers, loop the end and snip off the excess. Repeat until you have the desired number of beaded head pins.  Thread larger jump rings through the holes punched in the butterflies. Use the smaller jump rings with the head pins. Attach the butterflies and beaded headpins with the attached jump rings to the chain alternating between the two. Because the shrink film is clear you can see your image on both sides. This allows you to hang your butterflies going either direction. (See photo.) Attach the chain to the earring hooks. 


Bonus Card "Spread Your Wings and Fly" 

Since I had some extra shrink art butterflies to play with and some gorgeous Gina K Ephemera, I set out to make a card. I used the same butterfly stamp from the Gina K "Never Lose Hope" set  and watermark ink to create a subtle (and matching) background. After wrapping twine around the cardstock and tying on the butterfly, I layered the Gina K Ephemera using foam dots, and added the sentiment.


Supplies used: "Never Loose Hope" Mini Acrylic Stamp Set-Gina K Designs, Watercolor Floral Ephemera Pack-Gina K Designs, Cardstock, Trimmer,acrylic block,  black ink pad, watermark inkpad, bakers twine, extra shrink art butterfly, adhesive, foam dots.

Thanks Gina K for providing the stamps and ephemera to play with! I LOVED THEM!

Want to see more gorgeous Gina K Design Projects? Check out the rest of the Designer Crafts Connection Blog Hop Designer Crafts Connection-Gina K


Monday, June 13, 2016

Act Fast!

You have 10 minutes to run through Wally World to pick up something "clever" for a thank you for Operation Christmas Child team on a limited budget...what do you do?

Do you?

A) Pick up gift cards just kick in the extra money after all it's your team
B) Give up, give them a hug or a handshake and a hearty "Thank you" after all it's the thought that counts.
C) Run around the store like a crazy woman dashing between, the Christmas aisle and craft aisle


If you are me...you pick "C" I recently had to put together quick thank-you gifts for my area team. Since hubby was waiting in the car and his patience was limited, my time in the store was too!

My first stop was to the "Christmas Aisle" where I picked up 4 packs of ball mazes. They happen to be discounted to $1 per pack...score!

Next on my whirlwind trip was running to the paper craft/wedding aisle. (I don't know about you but our store has separated art, sewing, crafts, from jewelry/wedding/paper crafting, which makes zero sense!) Here I found adorable mini paper "bags." $1.98 for 10...not bad!

Last stop was to the Christmas wrapping area, here I picked up tubes of mini bows, anything mini is cute. $1 for a tube of 8

Running through the check out, My grand total was $10 and I was out in 10 minutes!

When I got home it was simply a matter of using my printer and some tape to pull it all together. I started by creating "You are Ah-Maze-ing" mini cards. I used a business card template, and layered it over a free maze image that came with the program. After printing and cutting them out, I used the mini bags as envelopes.

To the outside of the bags I attached the mazes with some rolled up tape (While the items inexpensive, I knew most of my team had kids/grandkids that would enjoy playing with the game.) I added a bow for a cute presentation.

The end result was a handmade thank-you that cost under $1 each ($.58 each to be exact)


Sunday, February 8, 2015

Adorn It Blog Hop!

Hello! Welcome to the ADORN it, blog hop!


If you have been following along the hop, you should have joined us from Susan's blog, if you are new and want to start at the beginning, please visit ADORNit's Blog to start from the beginning.

The wonderful gals from ADORNit sent me a huge box of goodies to play with to feature their new Art Play Paintables line. The Paintable line features wonderful drawings for you to fill in with paint, marker, or even leave as is. The designs are printed on a nice heavy art paper (#80 cardstock weight), to help prevent curling when (if) it gets wet with your chosen medium.

I loved this line. I have always wanted to be able to draw but never inherited the skill of my mom or my sister, this allowed me to be an artist by simply coloring (painting) in the lines ;) Two of the images from the Home Paintable line just spoke to me, I had the perfect people to give them to! I decided to simply paint and frame them. 


After using watercolor pencils and crayons to fill in the images,  I softened the lines with water. I accented the drawings here and there with stickles, glitter glue and smooch inks just to give the piece a bit of shimmer and sparkle. Loosely cutting them out,  I mounted the images on paper from the ADORNit!  Blender Basics collection pack. After framing the pieces I still thought there was something missing,  so to make the images "pop-out" of the frames,  I accented them with some jute twine and matching buttons I had on hand from my stash. I loved how quick these gifts came together!

Next, I created a couple of cards using images from the "Be Awesome" collection.

Again I used watercolor pencils and crayons to fill in the images and softened them with water. To get some of the brighter accents on the piece, I dipped my watercolor pencil directly into the water then dabbed the drips off on paper towel. The wet pencil allowed for a precise line burst of color as seen on the "Be Happy" and the frame around the 2nd card. I mounted the images again using paper from the Blender Basics collection pack, this time punching out a lacy border with a Little B "honeycomb" border punch that was inked with Ranger distress ink in "Vintage Photo".

My final project is a wall hanging.  I used an image from the "Life's Journey" Paintable.


Here the image served as the focal piece for a 12' x 12' canvas. The canvas itself was edged in blue, green and gold Faber Castell gelatos then I off set the background paper ("Chapter Two" from ADORNit's Storybook Collection.) Before mounting, my background paper was zigzag stitched along the edges and stenciled with the gold lines with some watered down gelatos using the Crafter's Workshop "Swirls and Flowers" template. My house paintable was colored with watercolor pencils, and accented with candy red stickles, then framed with an inked paper doily.  The larger hearts were created freehand with some scrap cardstock that were inked and heat embossed. The title consists of random chipboard letters from my stash that were also inked and then accented with white pen stitching. A simple double length of grosgrain ribbon was used as a decorative hanger.

I can't wait to play more with the Paintables line. It was relaxing to put on an old movie,  pull out the watercolor pencils and crayons and color and paint and have something fun to create with when finished. To see the full Paintables line visit the ADORNit!  store. Thanks ADORNit! for allowing me the chance to play with the collection.

Before heading to the next stop on the blog hop...

How would you like to win a complete set of the ADORN it Art Play Paintables collection and an original piece from the artist behind Paintables,  Linsey Ostrom? Well to do so you'll need to collect the all of the clues along the hop and my clue is:
Collect all of the clues along the way and then email your answer to  janet@adornit.com, to be entered to win the prize.

The next stop along the blog hop is my friend, the uber talented Michelle Cummings at Faire Dust Dreams. (http://faeriedustdreams-michelle.blogspot.com/2015/02/craft-room-decorative-wall-plaque.html)

Thanks for stopping by, I hope you will subscribe using the box to the right to keep up on all my adventures!
                     and remember...you'll drive towards what you focus on, so AIM HAPPY!


Saturday, February 7, 2015

Be My Valentine!

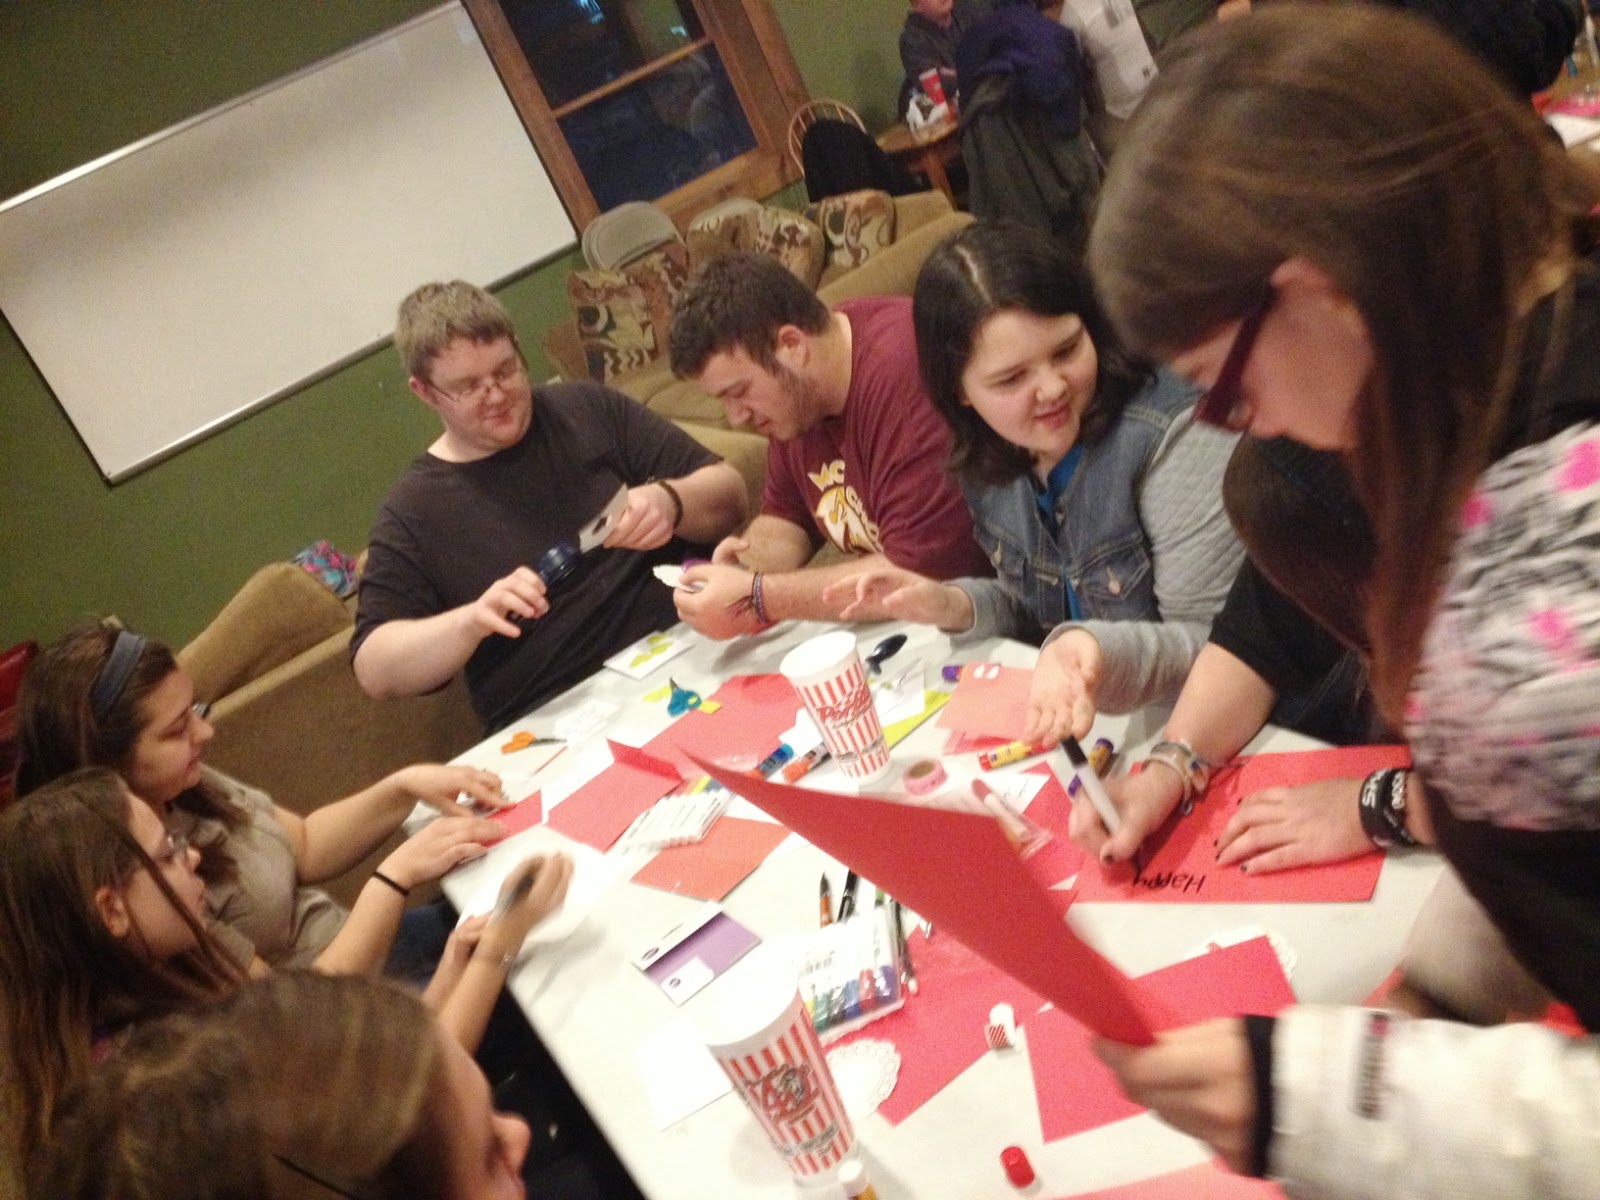
Volunteering at the local youth center I get to work with some amazing teens! When I get to bring my love of crafting to the youth center....it's like the best of both worlds!


Yesterday, I brought colored cardstock, some Fiskars Squeeze punches, doilies, Hampton Art Washi Tape and markers and let the teens go to town creating Valentines cards for our local nursing home and the local homeless shelter. Twenty-four teens and nine adults had a blast creating cards and talking about their "Valentine's Days" when they were kids.

They did an amazing job! I'm sure the residents will love them!