Showing posts with label Crazy Shoebox Lady. Show all posts

Friday, November 13, 2020

Me and my "Girls" -Doll Making for Operation Christmas Child


There is a reason I am known as the #CrazyShoeboxLady. That was proven with my latest project about 8 weeks in the making! It's Shoebox Season for Operation Christmas Child and that means I have been busy packing shoebox gifts. This year I was blessed with doll kits. 24 kits to make 18" "American Girl" style dolls. The kits were relatively simple to put together as they were designed for kids, BUT they needed some love (and some quality control at the factory) in order for them to become a cherished plaything I needed to put some effort into making them special.

As you can see they had a large gap no matter how much "stuffing" they were filled in so they all needed to be hand stitched. This was accomplished over about 6 weeks. In the car on the way to my Nephew's wedding. While watching TV. While catching up with the kids and the hubby at night.  I also needed to check all of their joints (some needed to be sewed and or glued in place as did their neck pieces.)

 As I finished I could then begin to trim  (check out the photo below to see just how "off" it was. ) and style their hair.


When all that finished the real fun began. I got to dress them!  The dolls had a simple outfit but part of the fun of this style of doll is to change their clothing. So I put out a call on Facebook and many friends came to the rescue. I had donations of 18" doll clothes coming to my door for about 2 weeks. One friend donated "themed" outfits, handmade shorts and dresses, and another "everyday clothing" and then I picked up underwear and shoes (Amazon has almost everything.)  

It was fun to see my collection of "girls" grow. I will admit we had a few laughs together watching sitcoms and even a movie or two together. My son came home from college one weekend saying "Ahhh mom....never mind" (he knows me well.) 


All in all it took about 2 months to complete all of the dolls and and it was total labor of love! Each doll is traveling with a tote bag filled with two changes of clothes, and a couple of accessories. Plus I traded one of them to a fellow shoebox friend for 23 doll quilts (she wanted to send one and I couldn't blame her they are adorable. ) So each doll has their own doll quilt. 


And because I had way to much fun with them. I even created a mini shoebox for each doll and mini items to put into the shoeboxes. It started out with a PDF template I created, then the long tedious process of hand cutting out and scoring the boxes (thanks for to my Score-Pal) that wasn't too bad. To fill their shoeboxes, I created mini t-shirt jump ropes, wash cloths (cut from a dollar store towel) , mini soap (created from air dry clay) and even shrunk a printable set of paper dolls and an Operation Christmas Child letter to put in the box as well. I rounded their boxes out with mini cups (communion cup size), mini clothes pins, tiny rubber bouncy balls, "baby" hair clips (dollar store purchase), hair ties with hair ribbon, those mini paper parasols, a little pen, and my favorite item mini teddy bears or rabbits a friend donated from Amazon.


When I was finished I naturally had to have a photo shoot with all of the girls!


This was truly a labor of love, each stitch a prayer for the child it was going to and  I LOVED every minute of it! I pray the children that receive these boxes have as much fun with their doll as I did!   And before I get asked YES they fit into a shoebox


Operation Christmas Child National Collection Week is
November 16-23,2020
There is still time to pack a shoebox!

To learn how to pack a shoebox visit: How to pack a shoebox
To find your nearest drop off location: Operation Christmas Child Drop-Off Location


Wednesday, September 2, 2020

Shoebox Crafting!

If you have known me for any time at all, you know I LOVE creating for Operation Christmas Child shoebox gifts.

When I found the burlap wedding favor bags on clearance, I knew they had to be turned into "tic-tac-toe" games.

The burlap made it super easy to stitch on with cotton crochet thread. I simply back stitched along the lines to form the board.  The pieces store in the bag.  I love the result!


Supplies Used: Burlap Wedding Favor Bags ($6.99 for 12 1/2 off at Hobby Lobby), Crochet Cotton, Needle, Buttons for markers.

Friday, August 28, 2020

Scrubbing Turtles!

When most people see a bath poof they see something to scrub themselves in the tub with, not me...I saw a turtle!

When we had hundreds of bath poofs donated to our shoebox project I knew I didn't want to send them plain. So taking a couple of sheet of sticky back Fun Foam from Darice and putting them together sticky sides in. I then traced a "turtle" onto the foam. Creating a hole in the middle of the foam for the handle to thread through. The "poof" now becomes the shell. How fun is that? Even more fun, the foam acts as a boat and causes the turtle to float on the water.


Monday, August 17, 2020

Rya-tie -pom-pom ball.

Operation Christmas Child sends gift filled shoeboxes to children in need all over the world. National Collection Week is November 16-23. I love crafting for shoeboxes but like most I am busy so..
 I look for quick and easy craft projects to create for my shoebox gifts. While the staple items in my shoebox gift are “necessities” like school supplies and personal care items. I love adding toys that are sure to bring a smile to a child’s face!

I used to wrap yarn or t-shirt pieces around a cardboard form to make a pompom style ball, but when Plaid Crafts sent me their new Rya-Tie kit I knew I found an easier way.  The Rya-Tie was designed to makes tassels used to create a latch-hook style decoration, but the tool does more. It is a easy way to create simple pompoms that are fun for kids to toss around. When you wrap the long side you can create a larger ball, and wrapping around the shorter side gives you two pompoms for the same amount of work. These soft toys can be created in minutes and are a great items to include in 2-4 year olds boxes because they are easy to catch or put together a set of 3 or 4 and send some juggling photos/instructions printed from the web, and you have a fun gift for an older child. 

Supplies: 
1 Rya-tie by Plaid Crafts
2 rubber bands (comes with Rya tie kit) 
1 skein of “t-shirt yarn” or t-shirt yarn (Bernat Maker Home Decor Shown
2 Zip Ties
Strong scissors or clippers

Directions. 


You will be using your Rya-tie tool length wise. Place a zip tie long the top and the bottom of the tool.
Wrap yarn around Rya-tie from top to bottom holding the zip ties in place with the yarn.  The more you wrap the fuller your ball will be. With I found wrapping 300 times makes for 2 nice sized balls.

Place rubber bands around wrapped Rya-Tie, these will hold the yarn in place while you cut it. 

Cut the yarn down the cutting channel. first one side than the other. 

Close first one zip tie around the cut pieces and then the other. 

Fluff the pom-pom, snip ends to shape. 

To make one larger ball  rotate the tool 90 degrees and follow the directions above. 


Thank you to Plaid for providing the Rya-Tie tool kit and Bernat for providing the yarn

Monday, December 9, 2019

Puff Dollies

What do you do when someone donates 300 "potpourri dolls" to use for shoeboxes gifts? You remake them into "puff dollies."
These ancient kits came with everything you needed to create a potpourri doll (except the potpourri.) There was preprinted fabric circle skirts, the adorable doll head, and cute little arms. 


All that was needed were a few simple stitches and some stuffing instead of potpourri!


So a huge thanks to our volunteers that assembled nearly 300 of these dolls for our shoeboxes! I know there are some little girls out there that will LOVE THEM! 


Monday, November 11, 2019

No-sew Fabric Building Set

Operation Christmas Child sends gift filled shoeboxes to children in need all over the world. When packing your shoebox gift you decide on the age and the gender of the child you wish to pack your box for. Coming up with something new and different for boys shoebox gifts that doesn’t take up a lot of space is always a challenge. This simple fabric building set is a fun imaginative toy that allows kids to build “towers” and yet stores flat taking up little space, making it the perfect addition to a shoebox gift. 


Supplies: 
2- 8” x 20” pieces of fabric (cotton, or cotton poly blend) 
2- 8” x 20” pieces of  Therm-o-Web Ultra Heat and Bond Ultra Hold (Red Label) 
Iron
*Board
Scissors
Ruler/pencil
Template (if desired, see below)


# While the stabilizer is fusible, it is only a temporary hold, thus the need for the ultra hold permanent adhesive.

* a regular ironing board can be used, but due to the thickness of the stabilizer, I found a regular board and silicone mat worked best. 

Directions:

1) Prewash/Dry and iron fabric 

2) Using the board and the silicone mat as your ironing surface, lay first piece of fabric face side down, place the Ultra Heat and Bond adhesive side down on the back of the fabric. With your iron set to medium (no steam)  press the adhesive to the fabric for 2 seconds, repeat until the entire surface is covered. Don’t be tempted to turn up the heat to make the project go faster. If you overheat the adhesive as it will “melt”  into the fabric vs. adhering to the fabric. This is one time when it pays to be slow and methodical. 

3) Repeat with other piece of fabric

4) Lay stabilizer on your ironing surface. Remove paper backing from fabric. Fuse the fabric to the stabilizer pressing for 6 seconds, repeat until the entire surface is covered. Check to make sure the entire surface of the fabric is bonded to the stabilizer. 

5) Repeat with the 2nd piece of fabric on the other side of the stabilizer. Again heed the warning about being slow and methodical 

6) Using a ruler and pencil to draw guidelines or the template, cut fused fabric into desired shapes Simple ones work best. Squares, rectangles, triangles, hexagons etc.  no See the template for ideas or come up with some of your own. 

7) Cut “slits” into the pieces. A slight “wedge” shape can be used for ease of putting together. The wider end of the wedge should be towards the outside of the piece. Be careful when cutting out the slits that you don’t go past the 1/2 way mark. (See photo) 


To build- join the pieces by inserting one into another at a 90 degree angle along the slits.

If you are creating this to put into a shoebox gift.  Create a tower and snap a photo. Store the pieces in a large ziplock bag along with the photo to act as directions. 

Thank you to project sponsors: Therm-o-Web and Plaid Crafts for providing materials for this project

Please be advised that Plaid Enterprises, Inc. and Therm-o-Web,  have compensated the designer by furnishing product at no charge in connection with this posting. 

Project Template:


Monday, November 12, 2018

Thankful!

Well over 300 people (200 of which were there at the same time..lol) helped us fill

2410 shoebox gifts!!
Shoebox gifts that will become a tangible expression of God's love for children in need all over the world! We appreciate everyone that came out to help us fill, and sort, box, and "boo-boo bunny" Each and everyone of you is amazing! On behalf of the #CrazyShoeboxLady and her ever so amazing #CrazyShoeboxCrew we say "Thank-you!" 

Friday, November 9, 2018

Hope you will join us!

Check out the set up for the Shoebox packing party! Saturday November 10th, 2018  9 AM to 5 PM. At CYCM 508 West Illinois Ave. Morris, IL hope you come join us in blessing kids around the world through Operation Christmas Child


I'm speechless

It's not often the #CrazyShoeboxLady is rendered speechless...but this is one of those times. I always get concerned that we will might not have enough toys. This year especially 2-4 year old toys. 


I was introduced to the head of Operation St. Nick through a mutual friend. When they heard about what we were doing for Operation Christmas Child, he said come and take anything that will fit into a shoebox. Today we grabbed a shoebox for size comparison and were able to do just that! We were blessed beyond measure. These are just some of the wonderful donated toys to us for the packing party! Thank you to Operation St. Nick, and to "Lucy and Ethyl" for picking up the donations and getting them into our storage area!

Sunday, October 7, 2018

Are you coming?

One month from today we begin set up for our 7th annual #CrazyShoeboxCrew-Shoebox1K. 

Will you be joining us? 

Tuesday, June 20, 2017

Online Sew-a-thon Wrap Up

While we have been getting ready for the Operation Christmas Child, Three Rivers, IL area team Sew-a-thon. Our friends at All Free Sewing have been having one of their own!!

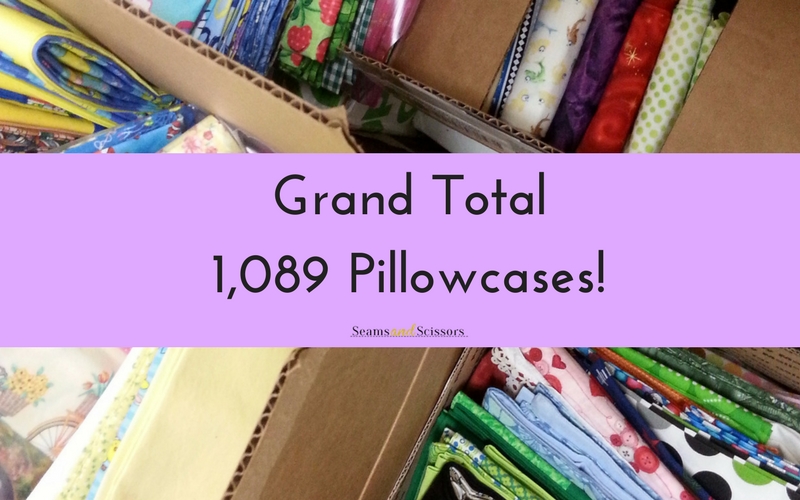
The grand total for the ONLINE SEW-A-THON is.....

Grand Total: 1,089 Pillowcases!


To hear and see more about the cases that were made for Operation Christmas Child check out All Free Sewing's wrap up!

Are you in the Joliet, IL area and would like to join us in person?? On June 24, sewers and crafters from all over are going to come together to make another 1000 pillow cases.  Check out the "Sew-a-Thon" menu at the top of the page for more information.!

Thursday, May 18, 2017

50th Anniversary of Mod Podge! -Crafting for Shoeboxes-Wobble People (Contest Closed)

One of my FAVORITE things to use is Mod Podge! I remember my mom using it as a child to make all sorts of craft projects and it's safe to say I followed in her footsteps!


Mod Podge is turning 50 and Plaid Crafts the makers of Mod Podge have declared May 19th as "National Mod Podge Day!"

The good folks at Plaid Crafts are holding a celebration all over the web to celebrate Mod Podge's 50th and sent me some Mod Podge to join in the celebration! Naturally I had to think of something fun to put into a shoebox gift for Operation Christmas Child using Mod Podge!

With Easter being just a few weeks back, we had a bunch of plastic eggs left over, when some spilled on the table they reminded me of a childhood toy. When I was little, I loved playing with "Weebols" (ya know the kind that wobble but don't fall down!)  If you don't remember them, check out this old ad I found on You Tube from the Museum of Classic Chicago Television


My version isn't as fancy, but just as fun and even the "big kids" around here had fun knocking them down only to see them wobble back up. Best yet, they are perfect for 2-4 year old shoeboxes!

Wobble People

Supplies: plastic Easter eggs (test first as you will be using these with Mod Melts and the thinner plastic eggs can melt), metal nuts, wing nuts or washers for weights, Mod Melter by Plaid, Mod Melt sticks, Mod Podge, Brush, scissors, cut outs of faces, alcohol markers. Silicone Craft Mat. Optional Supplies: Silicone tool set.


  • Start by opening the eggs, using the Mod Melter, glue a couple of washers, or one nut into the middle of the bottom of the egg. (Images 1 and 2) You will notice that the "middle is already marked out for you due to the markings from the creating of the egg. TIP-the more weight the quicker the egg rights itself, less weight equals more "wobble".  Wing nuts provide more of a "consistent" wobble. Experiment to find out what you like best. This is where the Silicone tools  came in really handy, they don't stick to the glue AND are heat resistant!
  • Carefully on the inside of the top half of the egg place a thin ribbon of Mod Melt and then quickly close the egg to glue shut. (Image 3) 
  • Color in your faces or images you wish to adhere to your eggs using alcohol markers. Alcohol markers will not run when you apply the Mod Podge. 
  • Mod Podge your images to the surface of the egg, for fun add images on the front and the back.  Allow to dry and add a second coat. I only covered the the image with Mod Podge. I felt it looked better.  TIP-if you create a "circle" of mod melt on the silicone mat and allow to cool, it will act as a base to hold your egg while Mod Podging. (Images 4 and 5)


You are now ready to try them out:


How would you like a chance to win a $50 prize pack from Plaid Crafts the Makers of Mod Podge???
This prize pack includes: -8 OZ. Mod Podge gloss,  8 OZ. Mod Podge Matte, 8 Oz. Dishwasher Safe Gloss, Mod Podge Photo Transfer Medium 2 Oz., Mod Podge Silicone Craft Mat, Mod Podge 7 Piece Tool Kit, Mod Podge 4pc Spouncer Set, Mod Podge 4pc Foam Brush Set. 


To enter, you simply have to leave a comment sharing your favorite toy as a child! Want a second entry, subscribe to my blog. Entries will be accepted until 12:00 Noon CST May 23th 2017. Sorry the contest is open to US residents only. Winners will be selected at random based on all comments. Be sure to enter your email in the comment form if you wish to be contacted when you won!

Be sure to follow Plaid Crafts on Facebook May 19th for more giveaways and amazing Mod Podge inspiration!!


Special thanks to Sarah Renee Clark.com for letting us use the "cartoon face" images on our Wobble People! To see the images we used check out her blog!


SaveSave
SaveSave

Wednesday, March 1, 2017

Roll-up Checkerboard

In the life of THIS crafter not only is March National Craft Month BUT as one that collects all year long for Operation Christmas Child "quality crafts" are the item of the month! What better way to celebrate both occasions than to create something for Operation Christmas Child!

I love creating items to put into my shoebox gifts for Operation Christmas Child. I believe I put a piece of my heart into every item I make. Who better to give a piece of my heart to than a child in need?

Operation Christmas Child typically receives the least amount of boxes for children in  the 10-14 year old age range. Having four kids of my own, my guess for this occurrence would be simply "what do you get (or make) a child that age?" For year round shoebox packers and filler item collectors I wanted to come up with a project that would answer that question.

This roll-up checkerboard fits the bill. Perfect for a boy or a girl it can even be personalized by the colors you choose, or the items you use for checkers. 

Supplies Needed:
Fabric placemat at least 12” x 18”
Stencil Brush
Masking Tape
Paper Plate 
24” length of Ribbon
Markers, Buttons, tokens (12 each of 2 different colors) 


Optional:
Iron
VELCRO® 5/8" sew on coins
 .     


Directions: 

Make sure placemat is clean and ironed flat if necessary

With placemat facing you lengthwise, position the checkerboard stencil on one end of the placemat and tape stencil in place using masking tape.

Using stencil brush, apply paint to the stenciled areas, remove stencil and allow to dry. 


Apply 2- 2 inch pieces of Fabric Fuse to the non painted end of the placemat. Fold non painted end of placemat up to the checkerboard to form a pocket. Apply firm pressure to taped areas to make sure the adhesive bond is secure. 

Fill the pocket with the pieces you have decided to use for checkers and roll up board. Mark area on back side you wish to place the ribbon tie. Remove checkers. Apply 1 1/2 inch piece of Fabric Fuse to middle of ribbon (you might have to trim or fold over the adhesive depending on the width of your ribbon.) Place ribbon unto area marked, and apply firm pressure to secure adhesive.


To play: unroll mat and remove checkers

For storage: place pieces inside of pocket and roll up. Tie ribbon to secure. 

Optional: 
Once rolled up most normal sized tokens being used for checker pieces should stay in place for storage. For bulkier pieces apply a VELCRO® 5/8" sew on coin along the edge of the pocket using fabric fuse.


A HUGE THANK-YOU to Plaid Crafts for providing the stencils, brushes, and paint, and  Therm-o-web for providing Fabric Fuse for this project!

Would you like to learn more about Operation Christmas Child and how you can pack your own shoebox gift for a child in need? Check out their website for more information.  How to pack a shoebox

Check out the #CrazyShoeboxCrew on Facebook

Thursday, September 8, 2016

Jump Ropes and "Koosh Balls" -Shoebox Crafts

This week over at Craft Paper Scissors they are featuring some of my favorite shoebox crafts for Operation Christmas Child. 

Packing a shoebox gift for Operation Christmas Child can be a personal experience. As you are choosing what gifts to put inside you want your gift to reflect the giver.  As a child my “claim to fame” was beating our principal in a Jump rope contest. I jumped 98 times compared to his 4. Who needs a gold medal? I felt like pretty big stuff for beating the principal of our school!!! This childhood memory finds me putting jumping ropes into shoebox gifts frequently.


You could easily go buy a jumprope, but why when you can make one for free with items from around your house and better yet, you can toss in an extra ball as well. 


Supplies needed:

Jump rope: 
  • Old t-shirts 3-5 shirts depending on the size
  • Good strong scissors-I find Fiskars Titanium Shop Shears work great for this project

Optional: image printed from computer.

Koosh ball:

  • Left over loops from jump rope project
  • Zip tie
  • Pliers
  • 5 “ piece of heavy cardboard
  • scissors
  • sandpaper


Preparation” 
  • On flat surface, lay out t-shirt and smooth out the wrinkles
  • Fold shirt in half sleeve to sleeve
  • Cut off bottom hem.
  • Cut loops approximately 1- 1 1/2 “ in size from shirt by starting at folded end and cutting across to the open end of the shirt.
  • repeat with other shirt.
  • Stretch out loops running your hand along entire length of loop while pulling


To create jump rope:
  • Tie three strips together, place your knot about 3-4 inches down. This becomes the handle.
  • Braid your strips together
  • When you get to the end of the strip loop another one to the bottom and continue braiding.
  • Repeat until jumprope is desired length (7 feet is ideal for most children)
  • Tie a knot at the end leaving 3-4 inches for a handle.
  • Cut open loops at the end of the knots to create fringe. 


I love making sure my jump ropes all color coordinate, and would find myself with extra loops from the project. So I did some experimenting and found I could create a “koosh ball” out of my leftover strips and a zip tie! These balls are fun and super easy for little ones to catch.


To create “Koosh Ball”

  • Take your loops and wrap loosely around cardboard like a “rubber band” 
  • Continue wrapping loops around cardboard until your ball is full enough for your liking. I found 7 loops wrapped around  6-8 times (depending on loop size)  gave me  approximately 50 loops around to make a decent size ball.
  • Take loops off of cardboard. Squeeze pile together and wrap a zip-tie  around the middle and tighten as much as possible. I find the pliers help to get a good grip which helps me tighten the tie more than with just my hands alone. Trim the zip tie to remove the tail and sand if sharp
  • Cut open your loops
  • Tie two of those open pieces around the zip-tie as an extra measure of protection


For more information on Operation Christmas Child, visit: