Showing posts with label home decor. Show all posts

Sunday, December 16, 2018

All that Glitters!

For the past couple of years I have been collecting old jewelry. Pieces from thrift stores and garage sales, antique stores and things given to me by family, have all found their way into my collection. The goal of the collection was to make a wall hanging out of the jewelry.

This project has been sitting in bits and pieces on my desk for about 2 years, and since I had some extra time the last few days so I  decided to finish it and just in time for Christmas!

After cleaning the pieces, I removed the pin backs and post if necessary, some of the pieces came to broken, so a little E-6000 was used to replace the gems. 

Try to remove pins and backings as close to the piece as possible, this will help the jewelry to adhere flat to the fabric.

Using a piece of black velvet for the background, I outlined a basic shape with masking tape on the velvet. I also used masking tape to secure the fabric to my cutting mat, because the fabric was slippery this just helped keep things in place. After figuring out the basic placement, I used hot glue to attach the jewelry to the fabric. 

Looking at all the pieces is like a game of "i-spy" 


The fabric was then attached to a board. I originally wanted to add lights to the piece, tucking them in from behind, but due to my Facebook opinion poll, decided against it. (26 to 11 in favor of no lights and three suggestions of gallery lights and one vote for a disco ball from my daughter. )  After the fabric was attached I used glazier points from MD Hobby and Craft to secure the wood into the frame. 

Insert the points parallel to the piece using a flathead screwdriver to wiggle into place, if you are having trouble a slight tap with the hammer helps. 
Because of the weight of not only the jewelry but the wood I attached the fabric too, I didn't want the frame to carry all the weight, so I attached a simple wood support frame to the decorative frame. 

You can see the holes originally drilled for lighting.

I love the finished project!


 I do agree it needs light to bounce off the jewelry to give it some added sparkle, but am glad I didn't embed lights as I think it might detract from the beauty of the jewelry itself. I still might add some type of gallery light but probably not the disco ball my daughter had in mind ;)

I pray all of you have a wonderful holiday season, and a very Merry Christmas!!!


Supplies used: Vintage jewelry, Velvet fabric, wood,  E-6000, MD Hobby and Craft Glaizer Points, Screwdriver, Hammer, Drill, Screws, AdTech multi temp glue gun, pliers, cutters, button shank remover


Thursday, April 30, 2015

Hallway Makeover with Stencil1

Have you ever noticed when you start redoing one room of your house you can't stop there? One room starts looking good and so it makes the rest of the house look bad??? So one room leads to two and so on...

When my dad agreed to redo the kitchen it led to working on the dining room, due to structural issues, then after I got the dining room all fixed up, it made the hallway look pretty shabby. So I did a quick coat of white paint to at least freshen it up. 

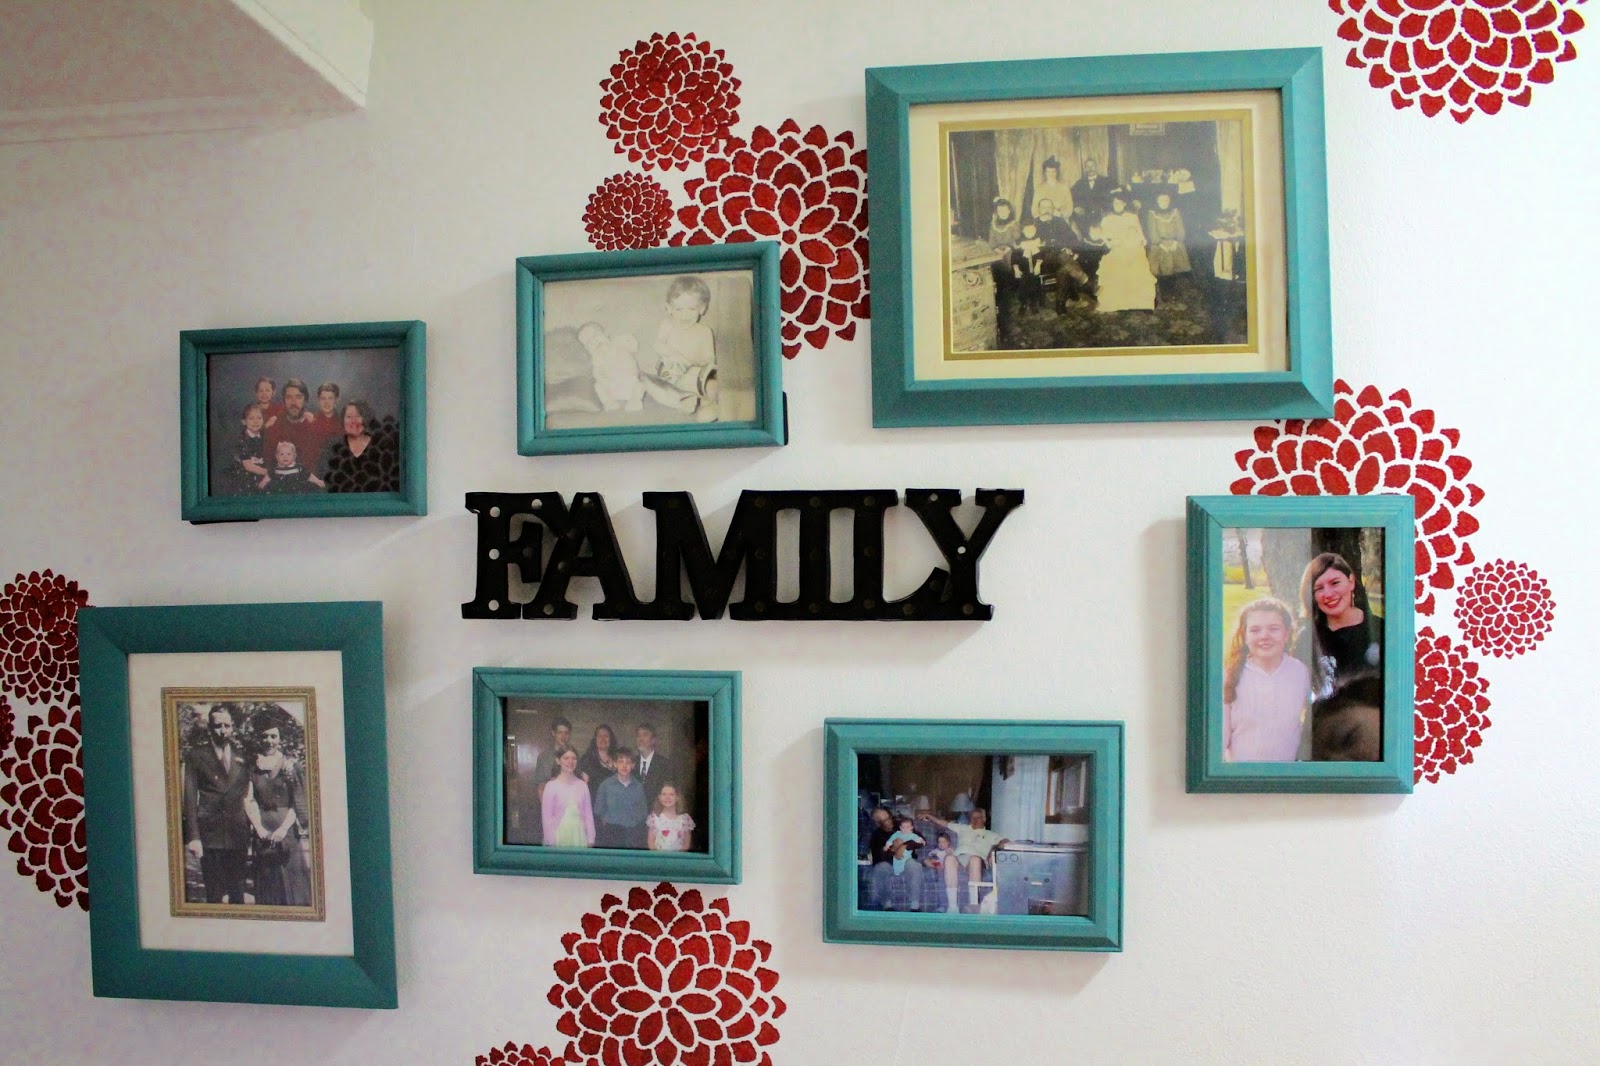
My hallway has always been my photo gallery. A hallway of memories so to speak. I never really had any rhyme or reason to it. Since I was redoing other rooms, I decided it was time for a change. I wanted to still have my hallway of memories, but wanted a more cohesive feel to it. Inspiration struck  at the Craft and Hobby Trade show when I saw a cool mum stencil from Stencil1. 

My idea was to use the 3 mum repeat stencil down the hallway and then paint my hodge-podge of frames all the same color to tie everything together.  So I tucked the idea into the back of my brain for a "when I have time" project, but then Stencil1 emailed! Their repeat pattern stencils won PRODUCT OF THE YEAR and was I interested in using one of them for a project? I shared my hallway idea and they loved it as much as I did. 

So Stencil1 set me up to do my "hallway makeover."


For my project I needed: Fresh wall space, paint, roller and tray, Stencil1 stencil (I used 3 mums repeat,) and painters tape. 

Since my halls were already bare and freshly painted I didn't need to apply a base coat. I wanted to have the mums tumbling all over the wall in more of a casual look BUT I am a little OCD when it comes to casual things. Some people can just casually pull something together, for me it takes a bit of planning to be casual!  Therefore to help with the placement I photo copied the stencil several times. I then used painters tape to place the images where I wanted them to "casually" go. This allowed me to play with the placement and positioning of the stencils and see the overall effect without having to commit quite yet with paint. 

After I was satisfied with the positioning, I was ready to get painting. Stencil 1 sent me their roller tray kit , to use with my project. The brush for the roller is a good quality sponge, that holds the paint well.

I used a few pieces of painters tape to hold the stencil into place and then I rolled my paint over the stencil. They say you only need a couple of pieces. I wasn't that brave (remember that thing I have about being a little OCD...) So I used a bit more than recommended to avoid what I call a "Betsy Mishap" of the stencil falling off mid paint. 

I found the sponge roller held ALOT of paint, and so it made sense to roll off some of it before covering the stencil. This helped prevent bleed through with the stencil. I also found you needed a lighter touch, if you were heavy handed with the amount of pressure you applied to the roller, you ended up with pools of paint that also could cause bleed through of your image. One failed attempt, and both these lessons learned I was ready to go to town.


I would take down my photo copy image and then replace it with the stencil and paint away. 
I moved from left to right top to bottom and when I got to the little storage cubby decided to paint that as well (the little roller was perfect for the small spaces around the handles and along the edges!)


I loved the effect of the mums tumbling down the hall way. 


All that was left was to paint the frames and hang them on the wall and decorate! 


I loved the finished product and can't wait to try stenciling elsewhere!


Thursday, October 23, 2014

Upcycled Mirror

I love this wood mirror I got at a church rummage sale, but the stark wood was just a bit to plain for my girls who love girly frilly froo froo! So I decided to give it a bit of a make over.

To do this I needed 2 cans of Krylon Spray Paint (one a shade darker than the other,) masking tape, hot glue gun, flower trim.


Make sure to paint the frame first, that way you don't see the wood through the flowers peeking through. You can shade the flowers with the darker paint, or add some highlights with the lighter shade.


The girls loved the finished project and can't wait to hang it above their dresser. To see more Krylon projects check out the ebook by Fave Crafts from their Make it Yours contest Krylon Free Ebook.