I loved this project I created for my son and daughter-in-law and it's always fun when others agree with you. I just found out that this pattern is featured in "8 Old Picture Frame Crafts" by Fave Crafts. Be sure to stop by there and check out my project and all the others in the collection.
Looking for a fun way to display photos with a vintage feel. Creating this rustic, chicken wire photo frame is a cinch with Plaid Craft paint and finishes.
Plaid Crafts Folk Art Metallic Acrylic Pure Gold
Plaid Crafts Folk Art Chalk Paint-Bavarian and Tuscan Red
Plaid Crafts Folk Art Crackle Medium
Plaid Crafts Folk Art Antiquing Wax
Plaid Folk Art Paint Brushes
Chicken Wire
Protective Gloves
Wire Cutters
Needle-Nosed Pliers
"Love" wood cutout
2 yards of 3" Burlap Ribbon
Burlap Flowers
Wood Clothespins
Soft Cloth
Scissors
Hot Glue Gun/Glue Sticks
Looking for a fun way to display photos with a vintage feel. Creating this rustic, chicken wire photo frame is a cinch with Plaid Craft paint and finishes.
Materials List:
Wood Frame (purchased from thrift)Plaid Crafts Folk Art Metallic Acrylic Pure Gold
Plaid Crafts Folk Art Chalk Paint-Bavarian and Tuscan Red
Plaid Crafts Folk Art Crackle Medium
Plaid Crafts Folk Art Antiquing Wax
Plaid Folk Art Paint Brushes
Chicken Wire
Protective Gloves
Wire Cutters
Needle-Nosed Pliers
"Love" wood cutout
2 yards of 3" Burlap Ribbon
Burlap Flowers
Wood Clothespins
Soft Cloth
Scissors
Hot Glue Gun/Glue Sticks
Instructions
- Remove picture and glass from frame if necessary, Clean frame well. Paint Frame with Plaid Crafts Folk Art Metallic Gold Paint and allow to dry. When dry, using paint brush, cover frame with Folk Art Crackle Medium using even brush strokes, be careful not to overdo it. The thicker the coat the thicker the crackle. Allow to dry. Apply a top coat of Home Decor Chalk in Bavarian. As the paint dries the cracks will appear.
- While frame is drying paint the word Love with a coat of Plaid Crafts Home Decor Chalk Paint in Tuscan Red allow to dry. When frame and "Love" are dry, apply a coat of antiquing wax over the surface of both using a brush. Use a soft cloth to buff away the excess and bring to a sheen.
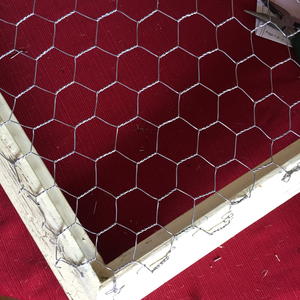
- Turn frame over and measure the chicken wire to cover the back opening. Trim as necessary using wire cutters. Be sure to wear protective gloves. Secure chicken wire in place on back of frame covering the opening. Secure chicken wire in place with staple gun. Turn sharp edges of wire under using the needle-nose pliers.
- Face the frame front again, Glue the word love in place. Embellish as desired with burlap flowers. Run a loop of Burlap Ribbon through the top of the frame and chicken wire on both sides and tie in a bow. Trim ends if desired with scissors.
- Use clothespins to secure photo (s) hang frame by bow.
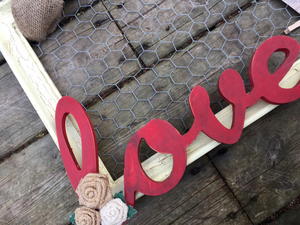

There you have it, a cute way to display some favorite photos! I especially like the photo I have selected as this is my son and new daughter-in-law!
A special thanks to Plaid Crafts for providing the paint and finishes for this project!


